
Many farmers under-dilute, spray at noon, or use the wrong NPK ratio for the growth stage. The result is either leaf burn or negligible nutrient uptake — wasted inputs either way. A 2023 PMC editorial reports that foliar inorganic fertiliser utilisation efficiency sits at roughly 30% for N, 20% for P, and 35% for K — so the margin for error is already narrow before technique comes into play.
This guide walks through the exact steps to apply NPK foliar fertiliser, the conditions that determine results, and the mistakes that most commonly sabotage the practice.
Key Takeaways
- Foliar NPK feeds crops through leaf surfaces for fast uptake — best during nutrient stress or peak growth stages, not as a soil replacement
- Match the NPK ratio to the growth stage: higher N for vegetative growth, higher K for fruiting and flowering
- Spray early morning or late afternoon — midday application in India's heat causes rapid evaporation and increases burn risk
- Dilution accuracy and spray coverage uniformity are the two most commonly mismanaged variables
- Drone-based spraying improves coverage consistency and cuts solution waste versus manual or boom sprayers
How to Apply NPK Foliar Fertiliser Step by Step
Step 1: Diagnose the Crop Need and Select the Right NPK Ratio
Foliar NPK works best when applied to address a confirmed deficiency or at a known high-demand stage — not as a blanket routine.
Reading visual deficiency symptoms:
- Nitrogen deficiency: Yellowing on older/lower leaves first; in maize, a V-shaped chlorosis pattern from the leaf tip
- Phosphorus deficiency: Dark green to purple or reddish-purple colouration, starting on older leaves
- Potassium deficiency: Yellowing and necrosis along leaf margins, typically on lower leaves around 4–6 weeks after planting
Matching NPK ratio to growth stage:
| Growth Stage | Recommended NPK Approach |
|---|---|
| Vegetative growth | Higher N formulation (e.g., 30-10-10) |
| General maintenance | Balanced NPK (e.g., 19-19-19 or 20-20-20) |
| First flowering | Balanced with slight P emphasis |
| Fruit fill / fruiting | Higher K formulation (e.g., 12-5-40) |

For example, ICAR's apple programme uses 19:19:19 at foliage sprouting stages, then shifts to 13:0:45 during fruit development — the ratio tracks the crop's shifting nutrient demand at each stage.
Foliar application cannot replace soil-level NPK. Macronutrients are needed in large quantities, and leaf surfaces absorb only a fraction of total crop demand. Use foliar NPK to address immediate deficiency or support critical stages — not as a substitute for a baseline soil fertility programme.
Step 2: Prepare the Foliar Spray Solution
Preparation quality directly determines whether the application produces results or damages the crop.
Mixing sequence:
- Start with clean or filtered water in a clean vessel — hard or saline water reduces nutrient solubility
- Add fertiliser to water (not water to fertiliser) while stirring
- Mix thoroughly until fully dissolved — only use water-soluble, foliar-grade NPK formulations; granular products will not fully dissolve and block nozzles
Concentration guidance:
- University of Delaware Cooperative Extension recommends a 0.5%–2% concentration range to avoid salt injury, with the exact rate depending on product and crop
- Product-specific rates vary: Haifa's tomato programme uses 0.5%–1%, while some products like Tracite Foliar 20-20-20 specify up to 6 g/L for backpack sprayers
- Always verify with the product label — over-concentration is the leading cause of leaf burn; under-concentration reduces efficacy without eliminating the risk of phytotoxicity
Before loading the tank, verify two things:
- pH: Target 5.5–6.5 for most foliar applications. Alkaline spray solutions increase phytotoxicity risk and can cause nutrient precipitation
- Wetting agent: Adding a compatible surfactant improves droplet spreading and adhesion on the leaf surface, extending contact time
Step 3: Set Up Your Spraying Equipment
Equipment choice has a direct impact on coverage quality.
Sprayer options by scale:
- Knapsack sprayer — suited to small plots; requires careful calibration and manual effort for consistent coverage
- Boom sprayer — practical for medium-scale operations; better uniformity than knapsack but still subject to operator error
- Drone sprayer — best option for large-scale or difficult-terrain farms; provides calibrated, uniform droplet distribution across the canopy with measurably less solution waste
Leher's drone spraying service, bookable through the Leher App, covers up to 50 acres per day (roughly 5 minutes per acre). A manual knapsack operator typically manages 3 acres per day — making drone application roughly 16 times faster for large plots.
Nozzle selection:
- Fine mist or hollow-cone nozzles produce smaller droplets that improve leaf adhesion and absorption
- Coarse droplets bead off leaf surfaces and run to the soil, wasting solution
- Clean nozzles before every session — blocked nozzles create uneven spray patterns that reduce the percentage of crop actually reached
Step 4: Apply at the Right Time and Under the Right Conditions
Even a well-prepared solution applied at the wrong time can burn leaves or wash off before absorption — timing matters as much as formulation.
Optimal spray windows:
- Early morning — after dew has dried, temperatures are lower, evaporation is slow, and leaves are in good physiological condition
- Late afternoon — before sunset, with lower ambient temperature and reduced drift risk
Conditions to avoid:
| Condition | Why It Causes Problems |
|---|---|
| Above 30–35°C (Indian field conditions) | Carrier water evaporates before nutrients penetrate the cuticle; leaves salt deposits that can burn tissue |
| Wind above 10 km/h | Causes drift; uneven coverage across the field |
| Just before rain | Solution washes off before absorption completes |
| Full midday sun | Combines heat and UV — highest burn risk |
Details farmers often miss:
- Target leaf undersides, where stomatal density is higher and cuticle is typically thinner
- Plan for 2–3 repeat applications spaced 7–10 days apart for visible deficiency correction — a single spray rarely resolves an active deficiency
When Should You Use NPK Foliar Fertilisation?
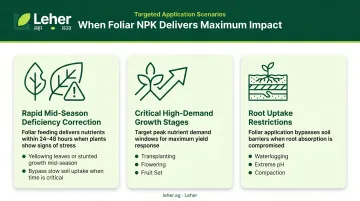
Foliar NPK is a targeted tool, not a default strategy. It works best in three specific scenarios:
- Rapid mid-season deficiency correction — when visual symptoms confirm a deficiency and soil application would be too slow to prevent yield loss
- Critical high-demand growth stages: transplanting, early flowering, and fruit set, when root uptake capacity may be temporarily limited by stress or soil conditions
- Root uptake restrictions — waterlogging, extreme soil pH, or compaction that prevents normal nutrient absorption from the soil
Knowing when not to spray is equally important.
When Foliar NPK Is the Wrong Tool
- When soil fertility is fundamentally depleted — foliar application addresses leaf-level symptoms, not the underlying problem
- On crops with thick, waxy cuticles (mature brassicas) that physically block absorption
- When plants are already under severe stress from pest damage or drought — stressed stomata and reduced transpiration limit uptake regardless of technique
- During full bloom — spray can interfere with pollination
ICAR agronomists are clear on this point: foliar fertilisation should be applied after a deficiency has been confirmed by tissue analysis or clear visual symptoms — not as a precautionary routine.
Key Parameters That Control Foliar NPK Results
Even with the right product and correct technique, four variables consistently determine whether the application delivers measurable results.
Solution Concentration
Getting concentration wrong in either direction costs you. Under-diluted solutions create osmotic pressure that dehydrates leaf cells and causes burn; over-diluted solutions deliver too little nutrient to matter. The effective range is narrower than it appears, and burn risk climbs sharply with high salt-index fertilisers — potassium nitrate, for instance, carries nearly 3.4 times the osmolality of urea.
A few practical factors that affect concentration outcomes:
- Use soft (low-mineral) water — it improves absorption and reduces the risk of nutrient precipitation
- Drop concentration by 10–15% when applying high-K formulations on sensitive crops
- Always test on a small plot before full-field application with unfamiliar products
Spray Timing and Temperature
In Indian field conditions, timing errors are the most common cause of poor results. When ambient temperatures exceed 30–35°C, the carrier water evaporates before nutrients can penetrate cuticle micropores. What remains on the leaf surface is a concentrated salt deposit — which burns rather than feeds.
Early morning (before 9 AM) or evening (after 5 PM) applications avoid peak evaporation windows and give nutrients time to absorb before the next heat cycle.
Droplet Size and Coverage Uniformity
Smaller droplets create more surface area contact and improve cuticle penetration. Larger drops bead off the leaf surface and reach the soil instead. Uneven coverage — missing leaf undersides or producing patchy spray patterns — directly limits the share of the crop that actually benefits.
This is where drone-based application has a clear operational edge. Services like Leher's deliver consistent micro-droplet distribution across the full canopy, including leaf undersides, without the variation introduced by manual spray pressure or operator fatigue.